
TL;DR
I made a 3D car simulation in Unity in which I implemented self-driving with TensorFlow.
Context
I was 14 and I had been programming for about 6 months or so when I came across an artificial intelligence video on YouTube. I immediately fell in love with the concept of machine learning. Eager to know more about reinforcement learning and dreaming of watching an AI of my own driving on a challenging road, I started working on this simulated self-driving car project.
Tools
To build the simulation itself, I used Unity and the Simple Town 3D asset pack from Synty Studios.
To implement self-driving, I used TensorFlow and the Unity ML-Agents library. Among many other things, ML-Agents made it a lot easier to transfer data from Unity to TensorFlow and vice-versa.
Map
The map on which the AI drives is a modified version of Simple Town's demo map. In a nutshell, I just rearranged the cars and added barriers to make a clear path for the AI to follow.
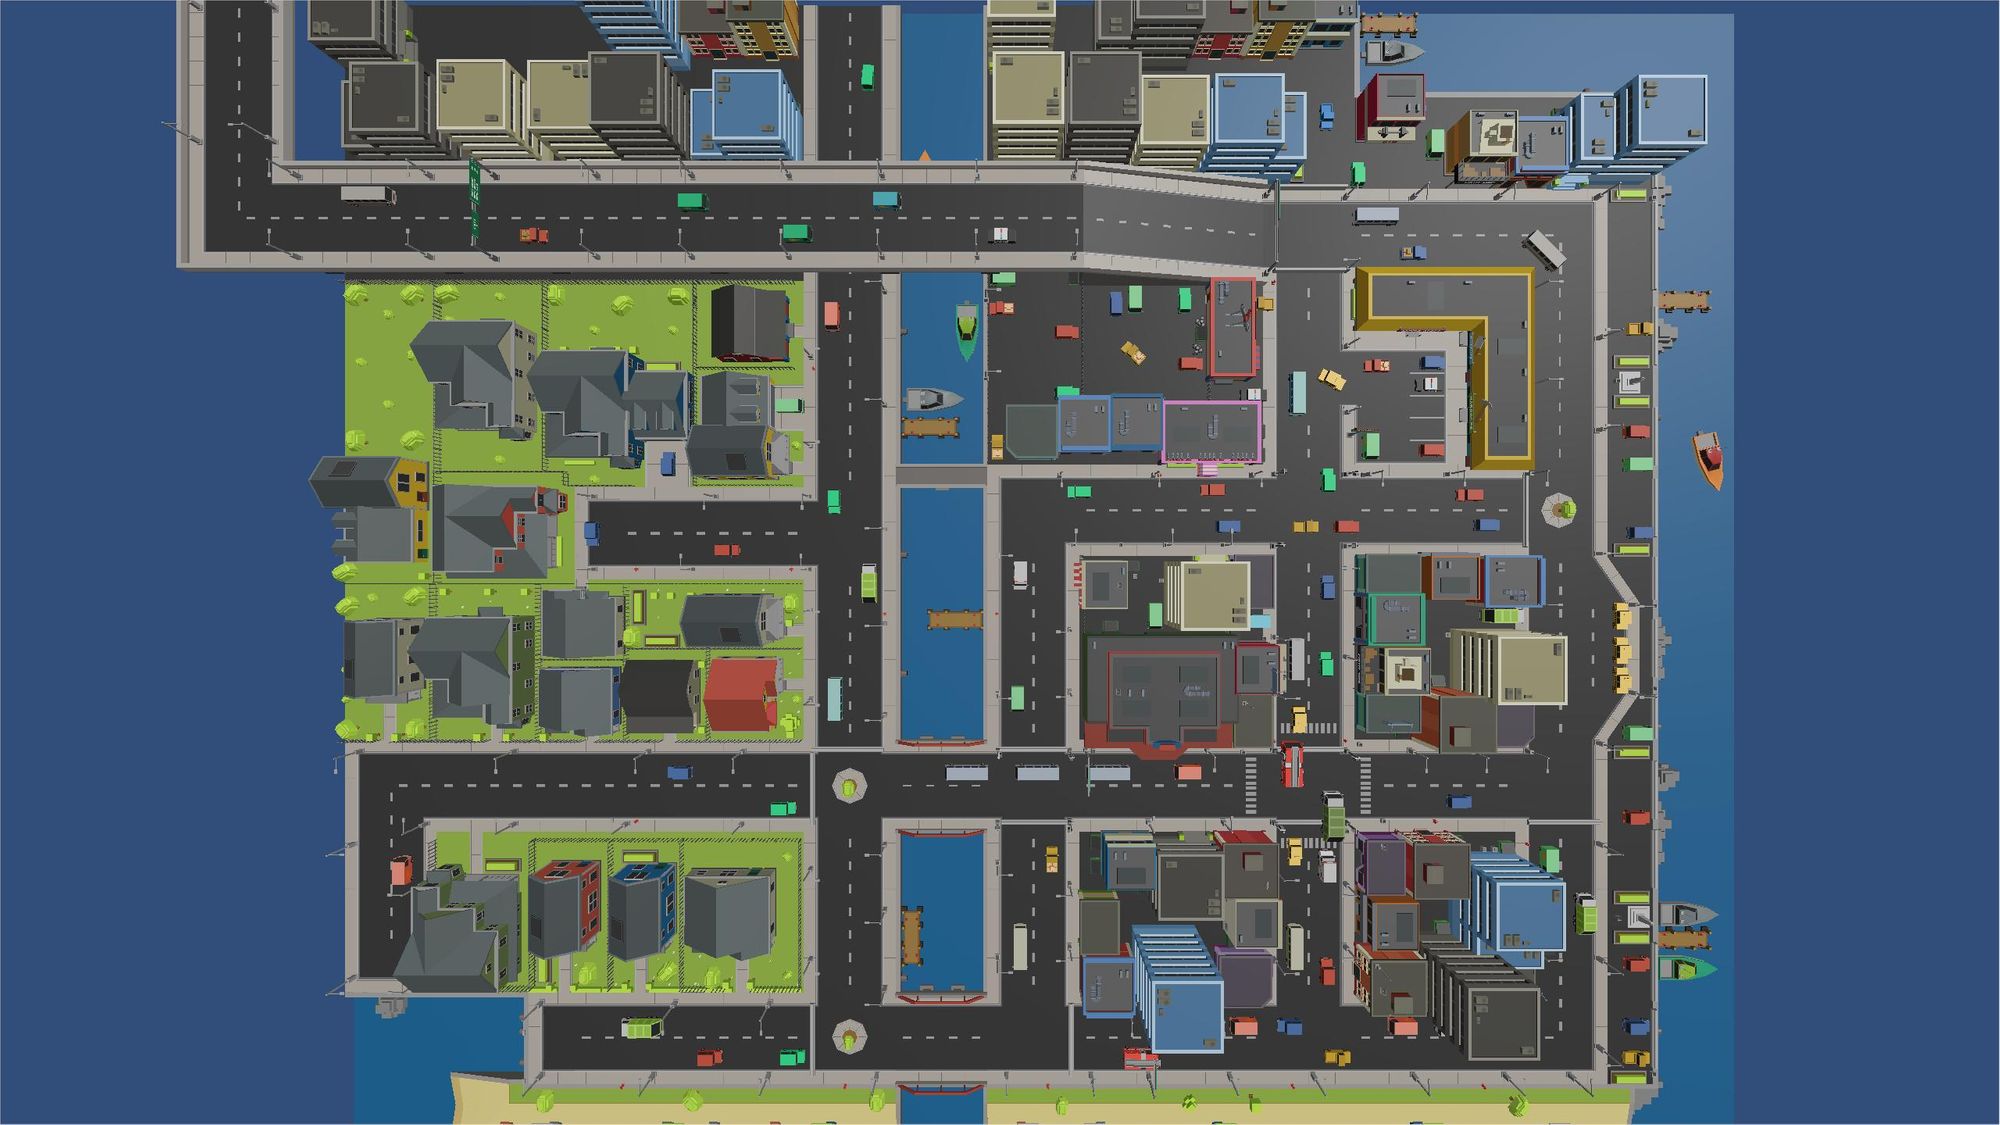
Different parts of the map allow the AI to learn to:
- drive forward when there's no obstacle in front of the car,
- turn when it arrives at a corner,
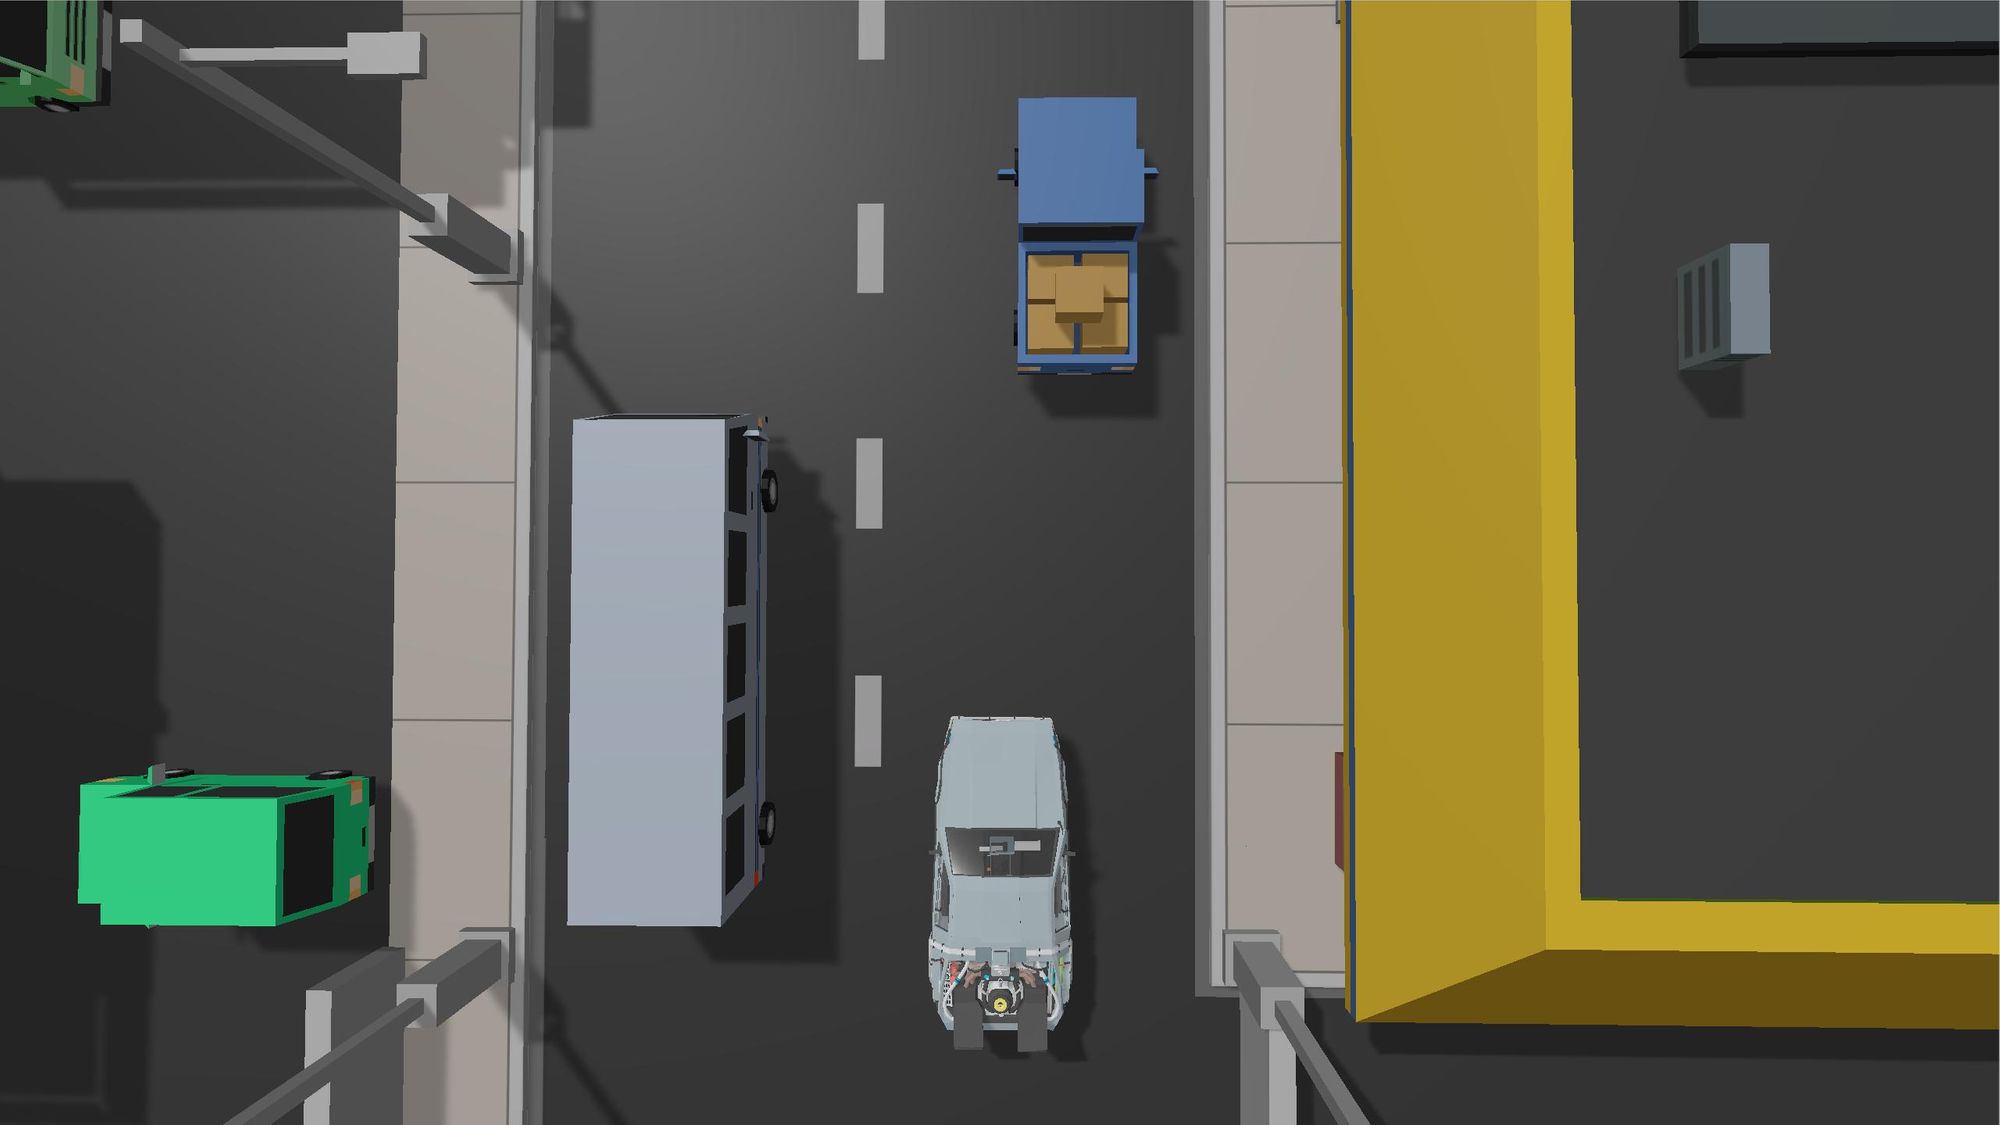
- make its way through "traffic jam",
- pass between two cars,
- deal with weird corners,
- handle roundabouts,
- come in at the perfect angle to pass through two extremely close trucks,
- and drive safely in (almost) every situation.
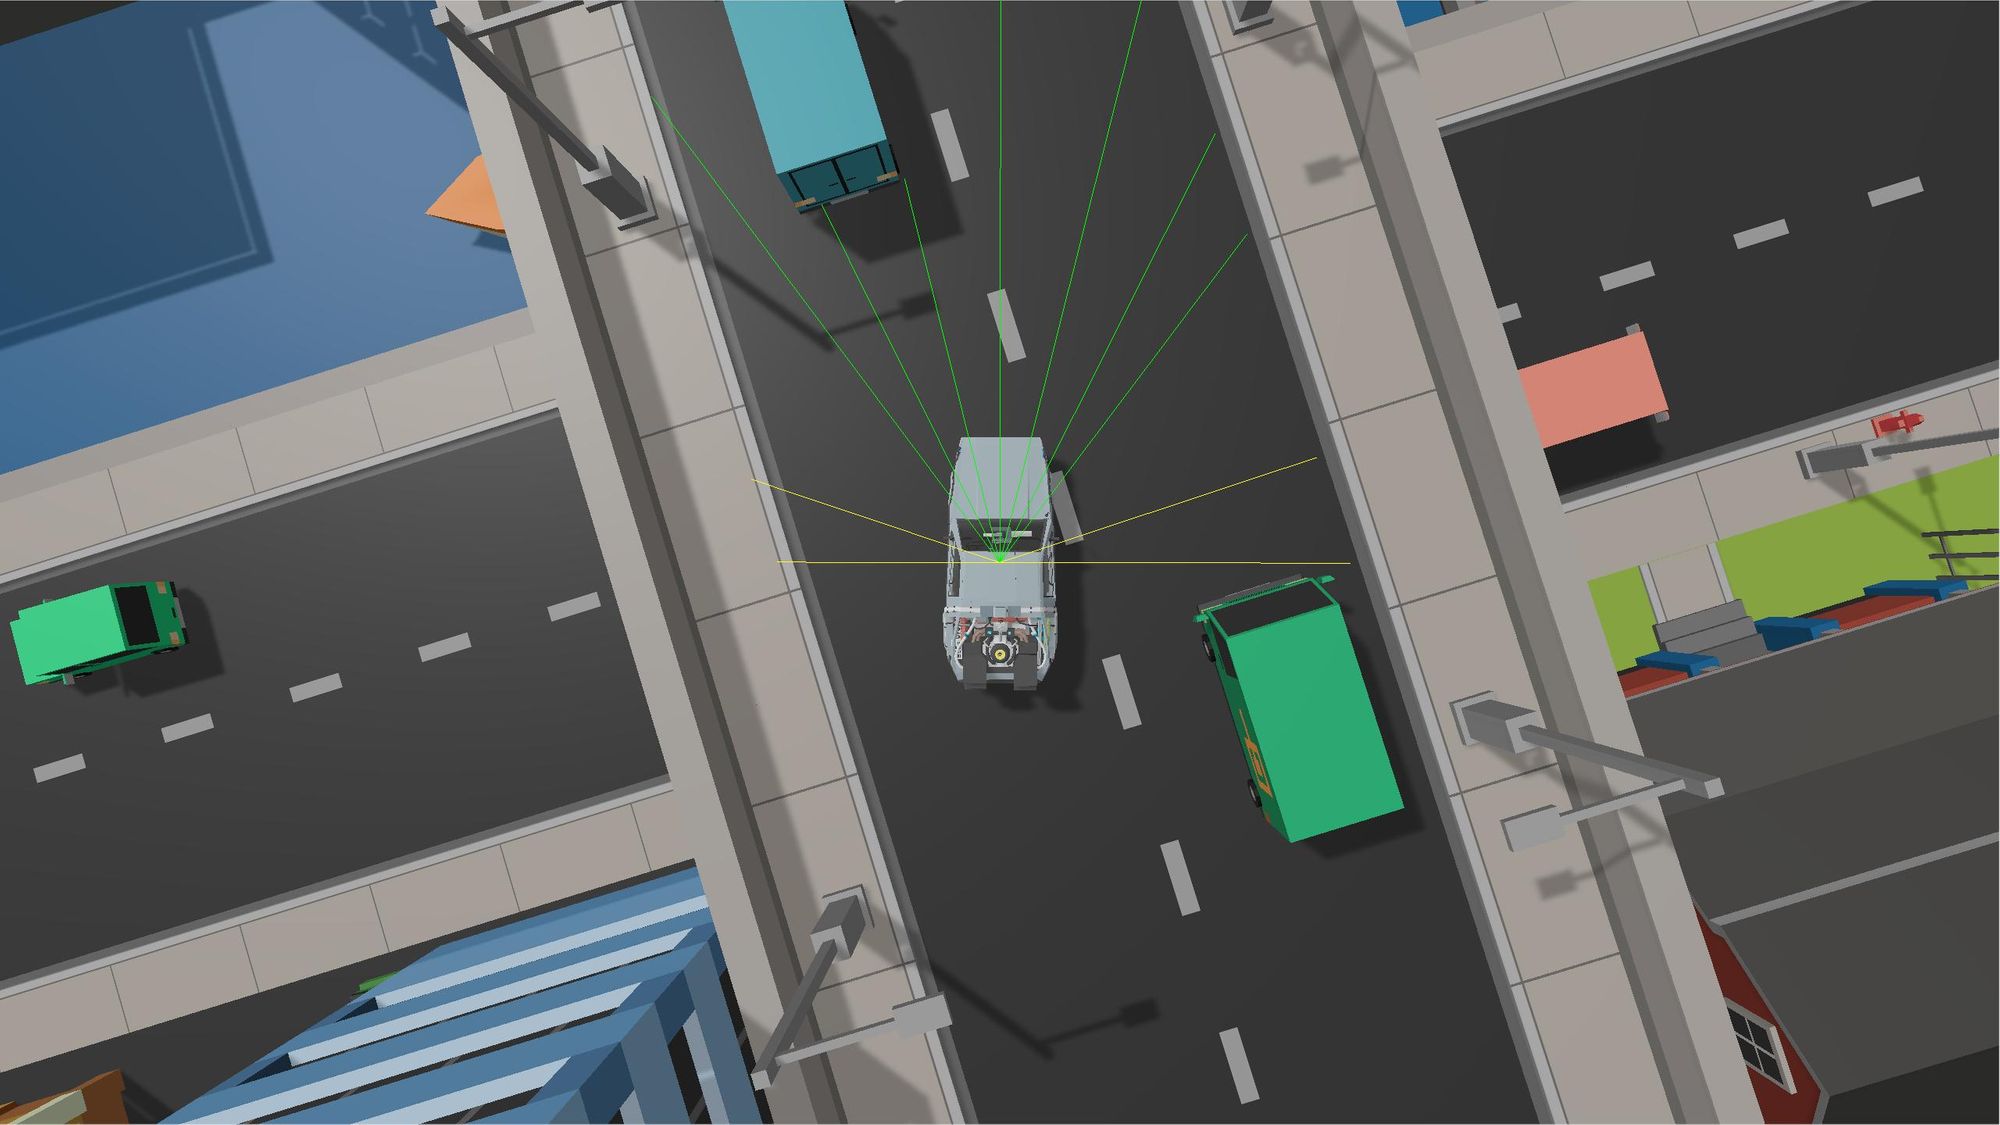
Inputs
Type
To make the AI aware of its surroundings, I had two obvious options:
- Take one or multiple screenshots of the game so it can "see" what's in front of it.

2. Use rays to hit the nearest obstacles and tell the AI how far away and in what direction they are from the car.

The latter offers a powerful advantage: it doesn't require rendering graphics during training, which makes it significantly faster. Moreover, using rays instead of screenshots means having to feed fewer inputs to the neural network, which also decreases training time. Even small speed increments were crucial, because the only machine I had access to was a 2012 MacBook Pro.
Confident in my ability to develop an arrangement of rays capable of generating enough information for the AI to drive properly, I decided to use rays instead of screenshots as inputs for the neural network.
Amount and Arrangement
Still wanting to reduce training time, I had to find the lowest possible amount of rays from which the AI could drive well. The key to this was the arrangement.
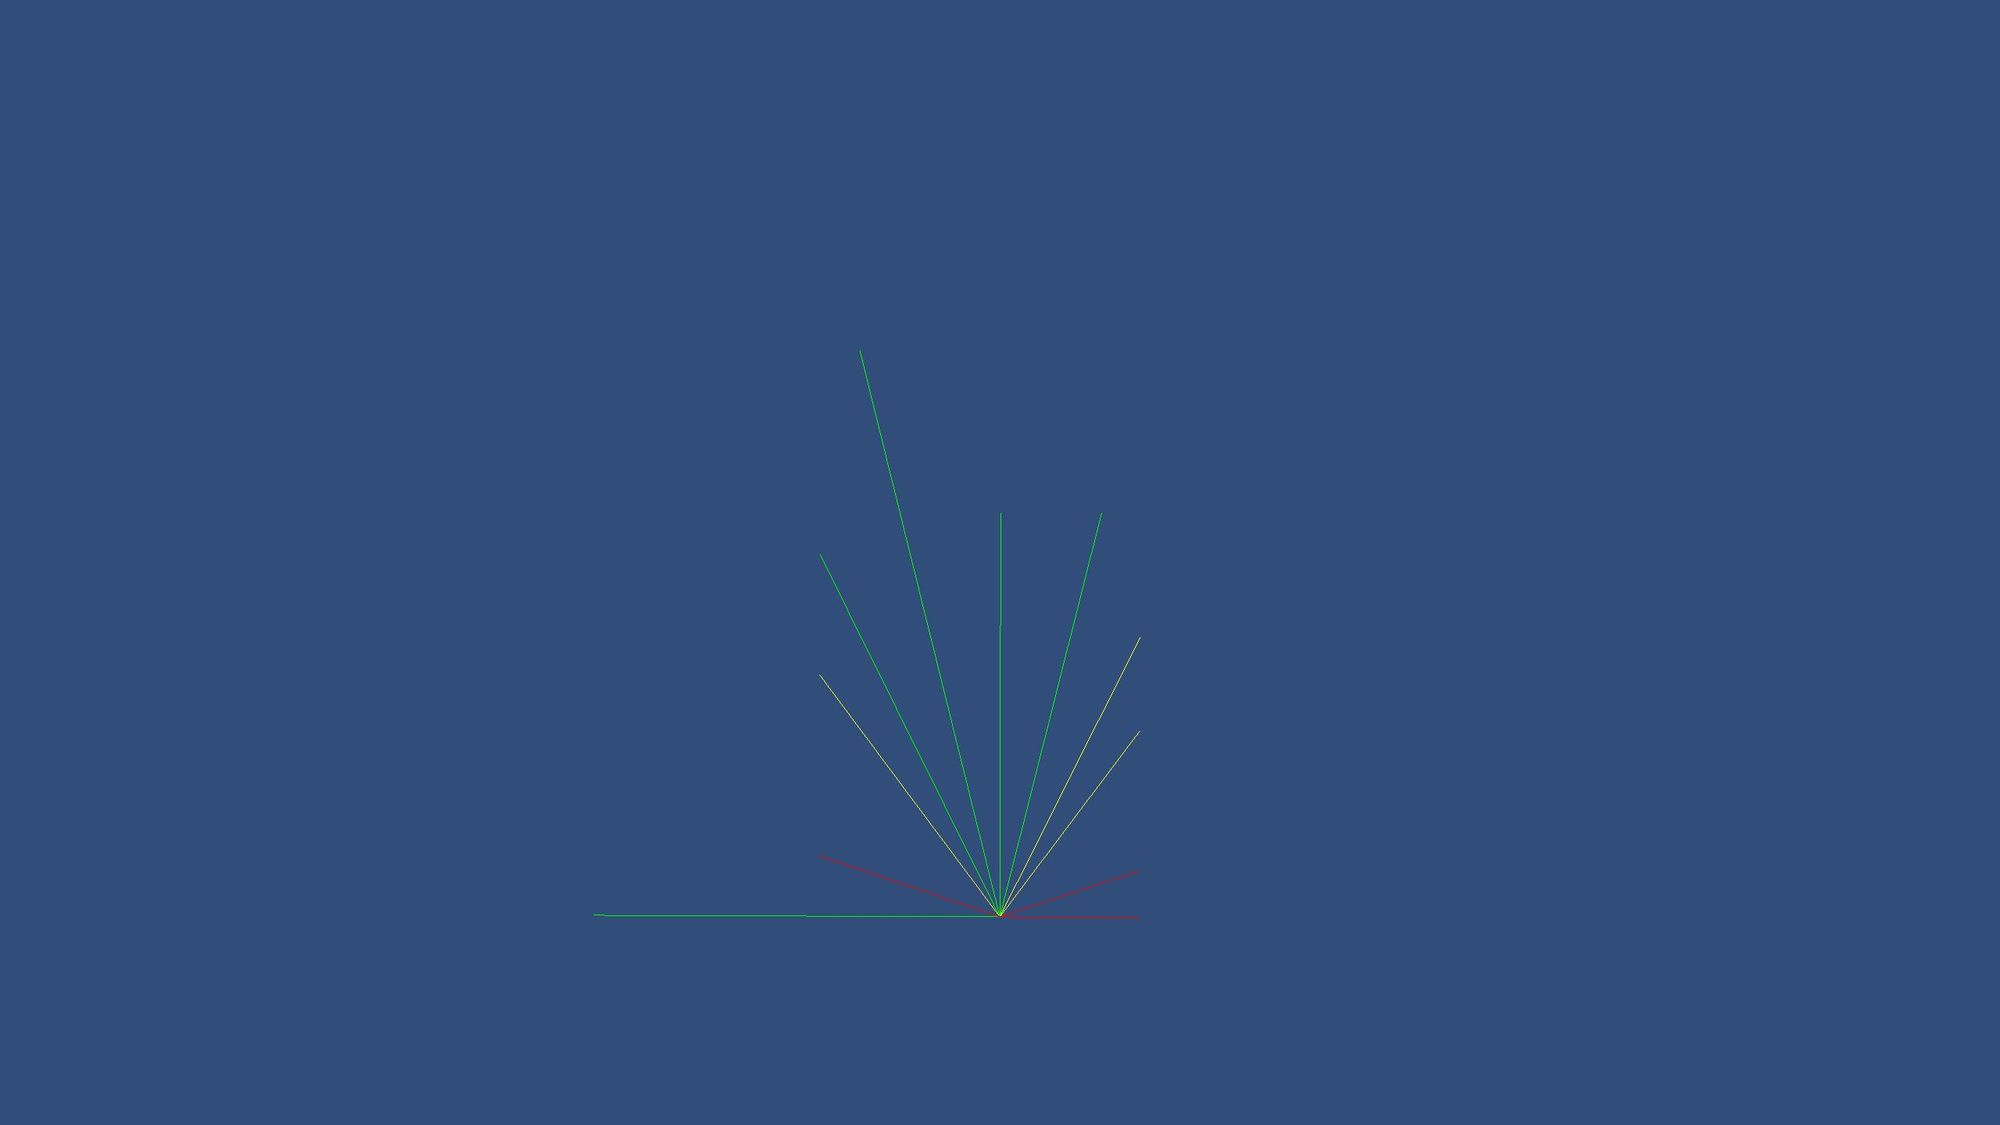
The first thing I realized was that rays going backward were not necessary. Also, I needed to use a considerable amount of rays going forward for the AI to be able to handle roundabouts.
Moreover, the rays had to be long enough for the AI to turn and avoid obstacles before it's too late.
After many tries, I opted for 11 rays arranged in this configuration:
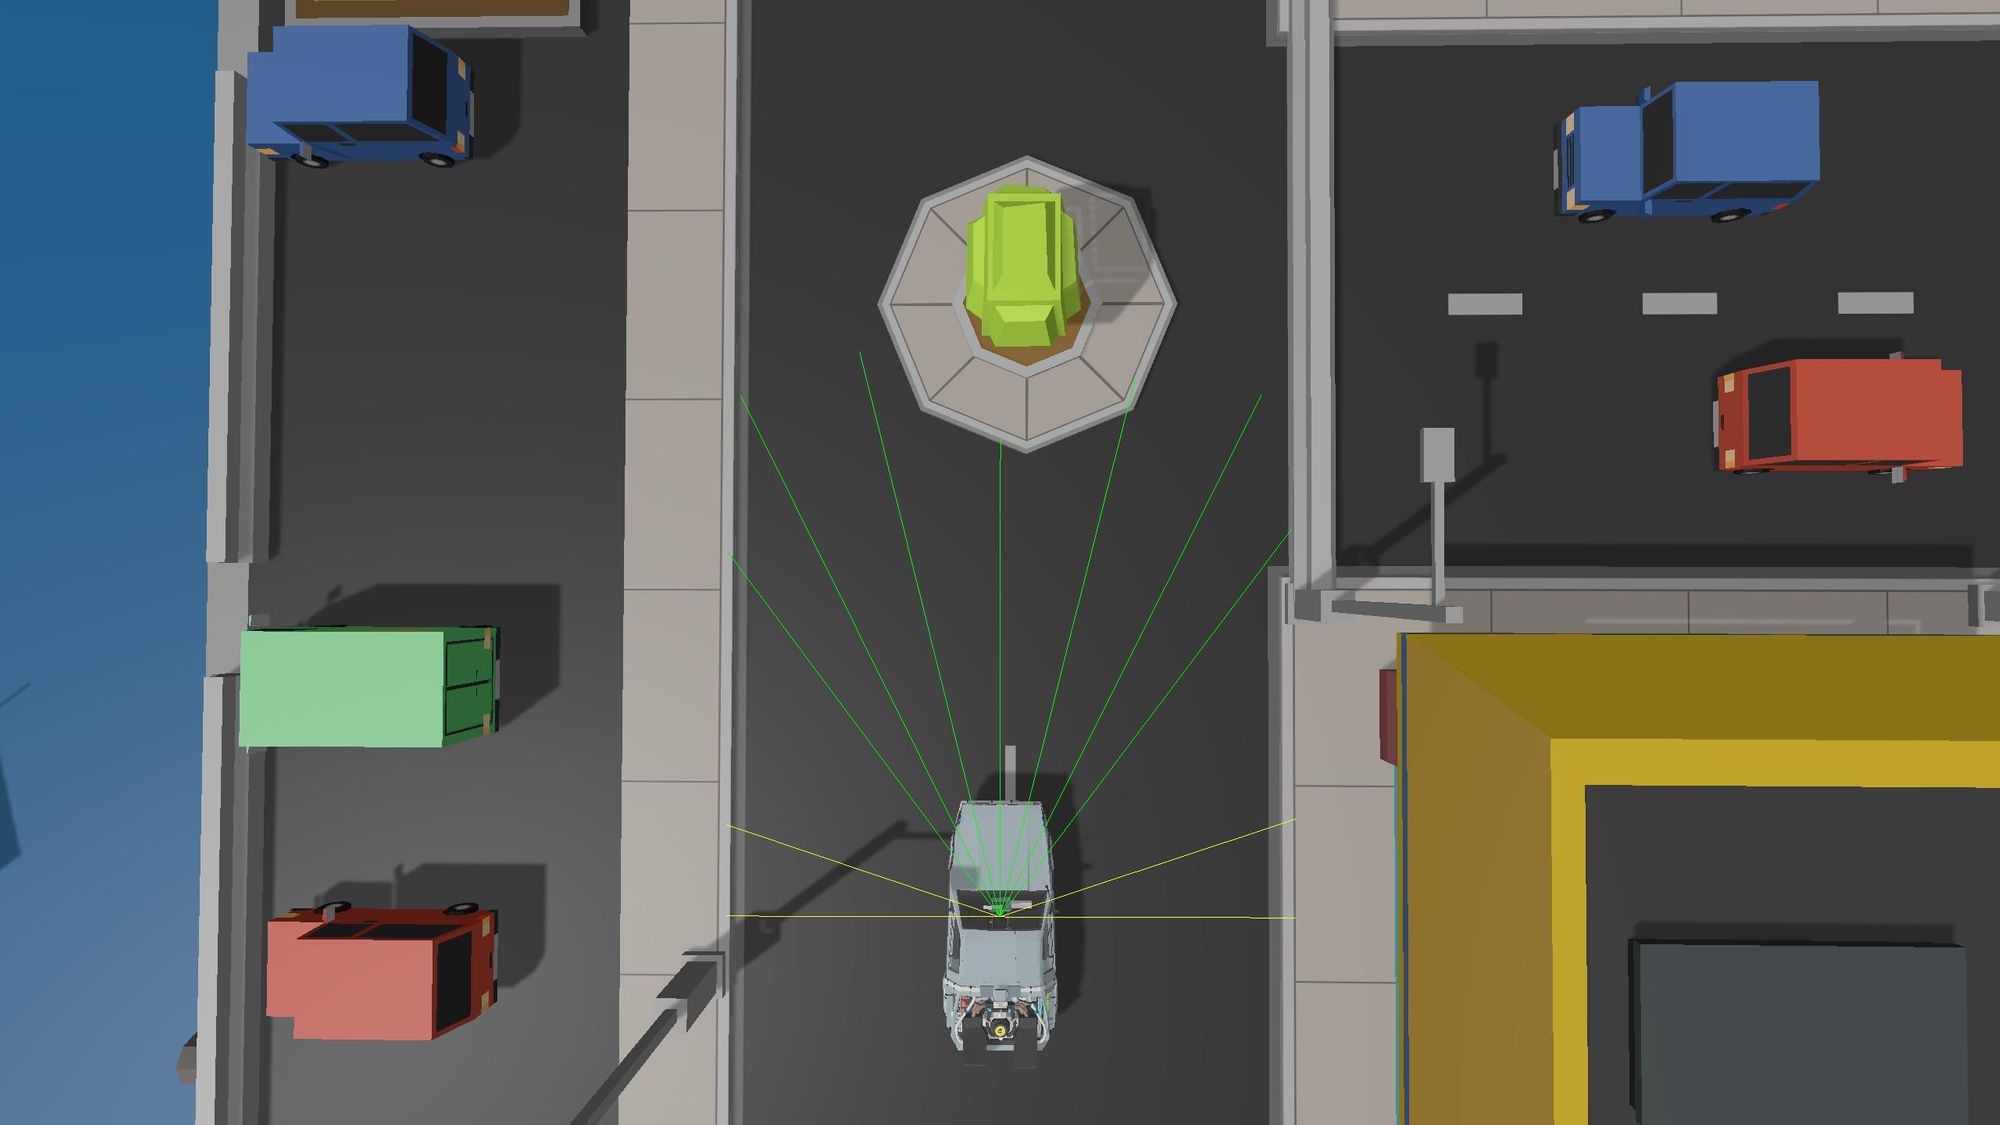
Outputs
The most obvious output combination that comes to mind when thinking about self-driving is "gas + steering". However, because the car was driving on my own simulation, I could easily make sure it wouldn't go above a certain speed. My objective being only the completion of the track, I decided the neural network would only have to output steering.
Training
Fitness Function
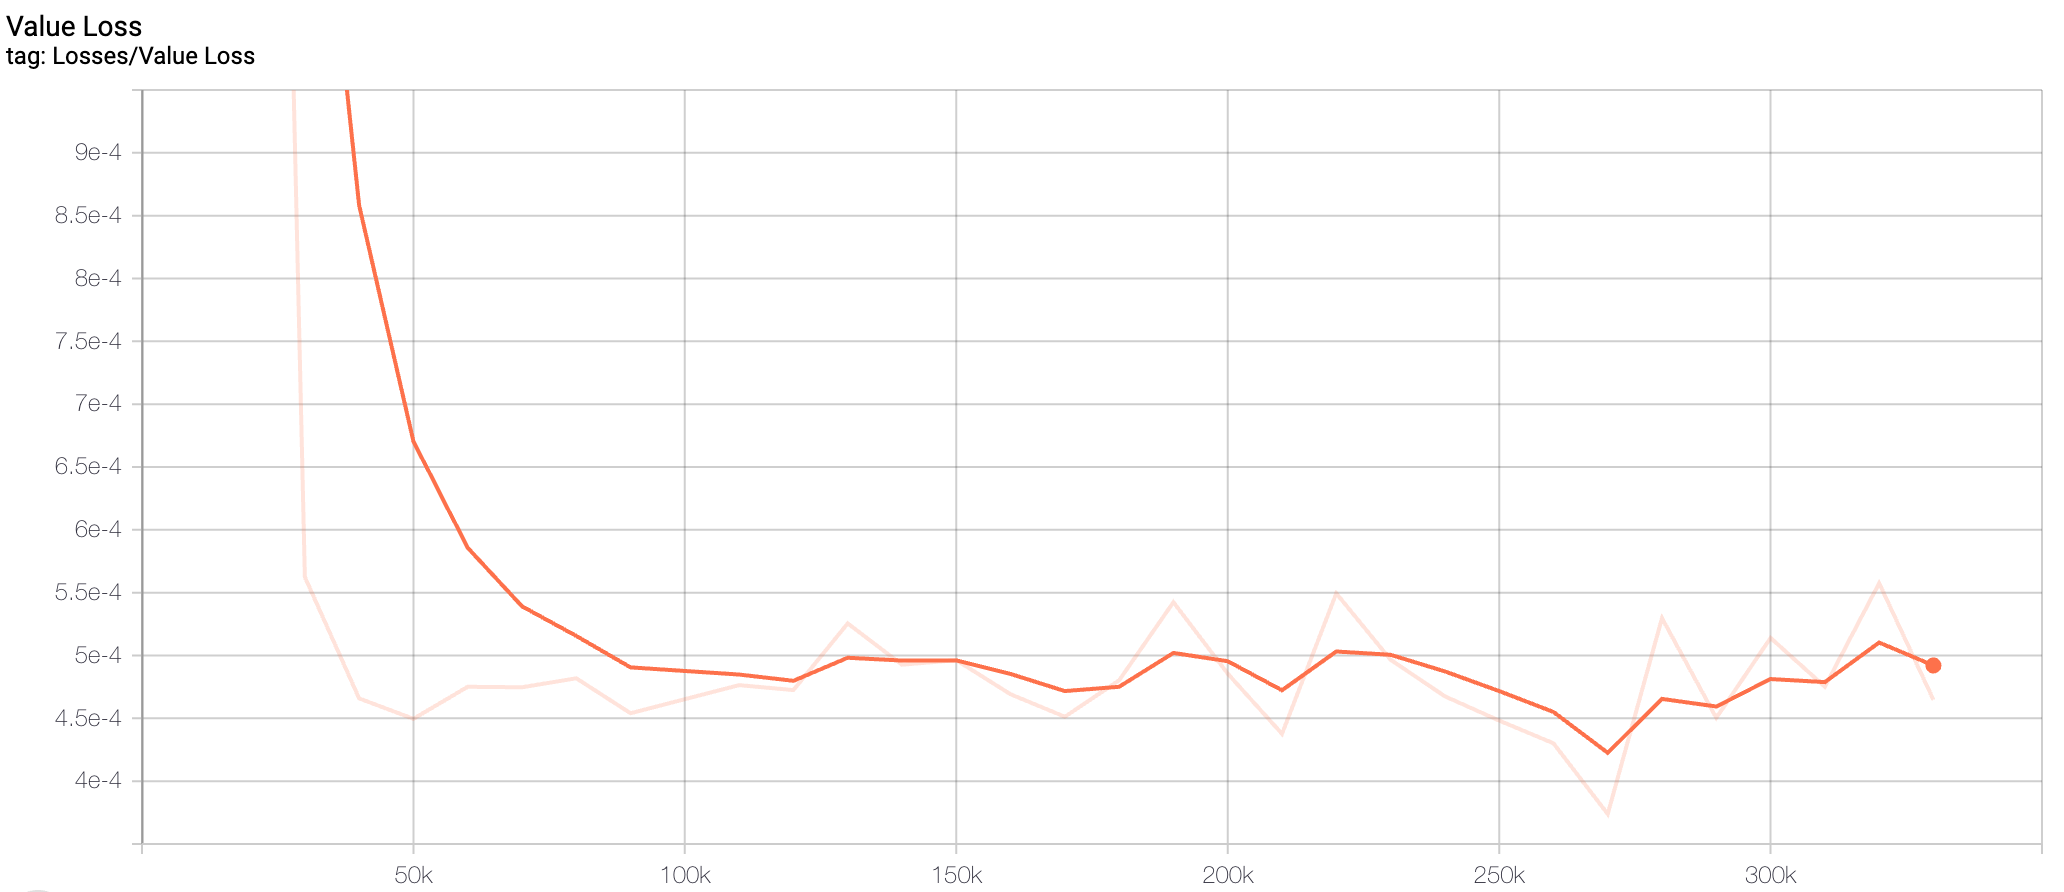
The neural network's fitness function is quite simple: it's the (normalized) distance it can drive before crashing the car into an obstacle.
Handling Headless Training
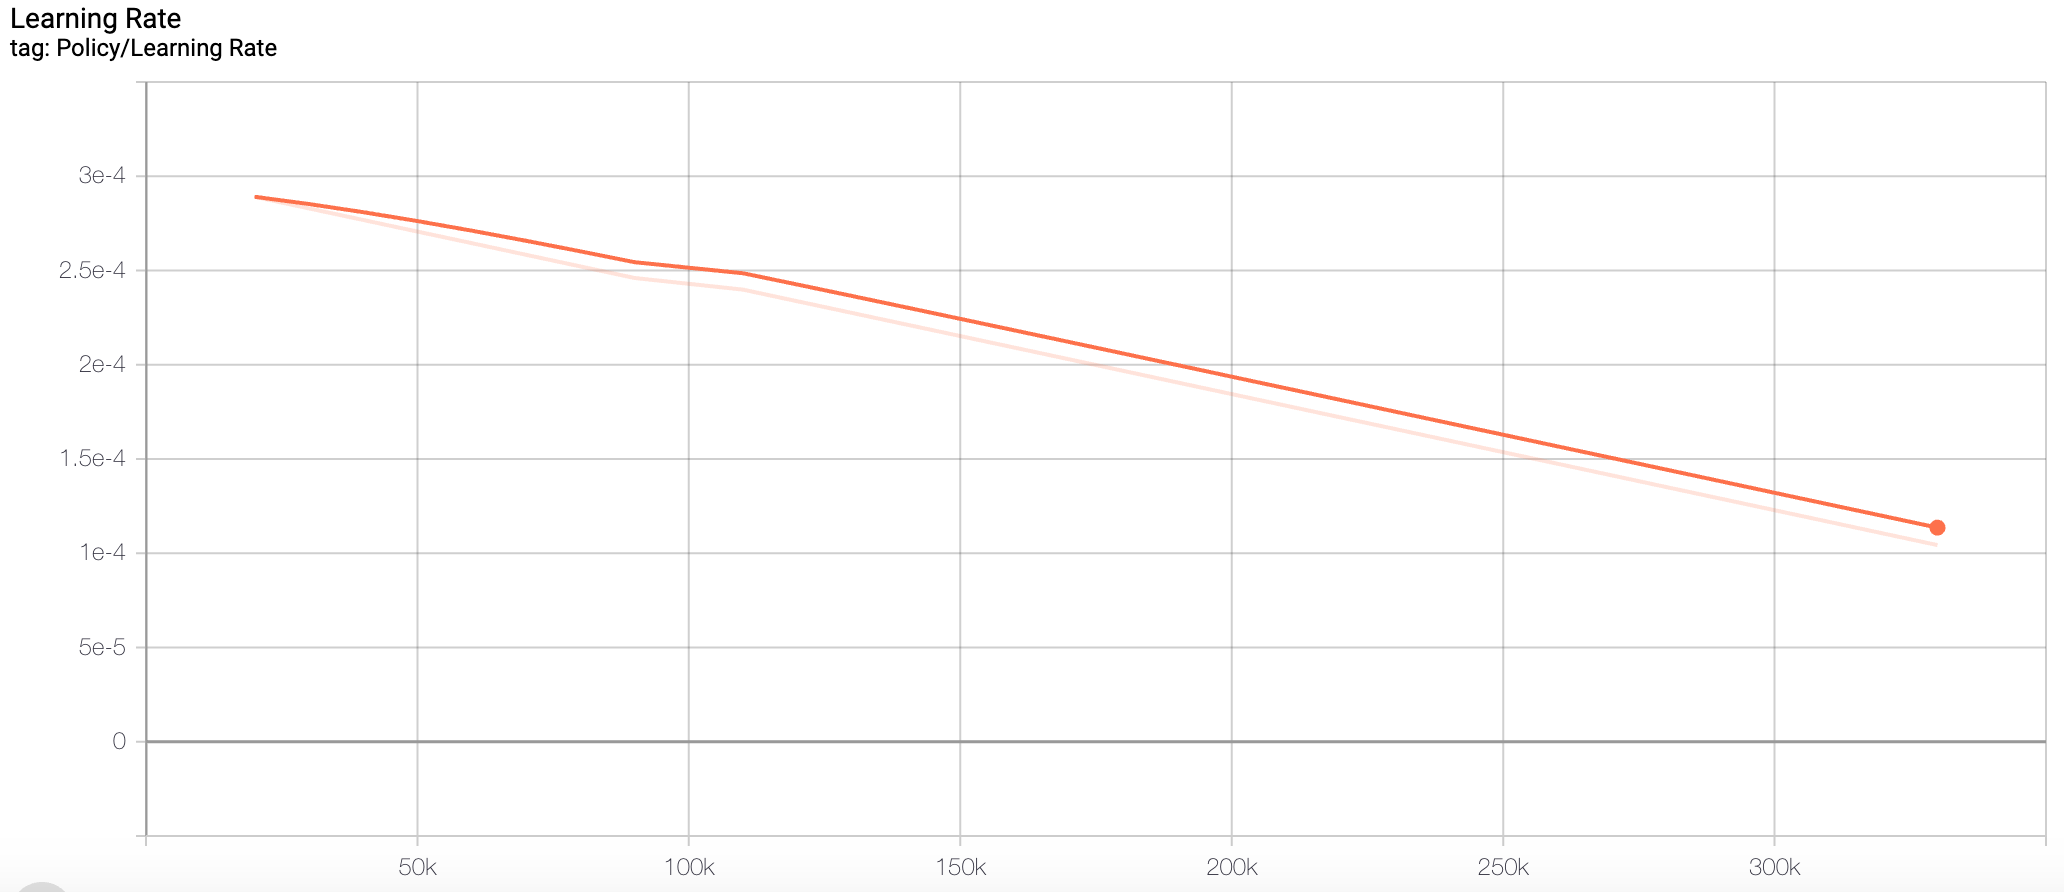
Not having to render graphics was the only way to make training possible on my machine (believe me, I tried without headless mode). To monitor my AI's progress without actually seeing it drive in the simulation, I had to track its performance metrics on TensorBoard.
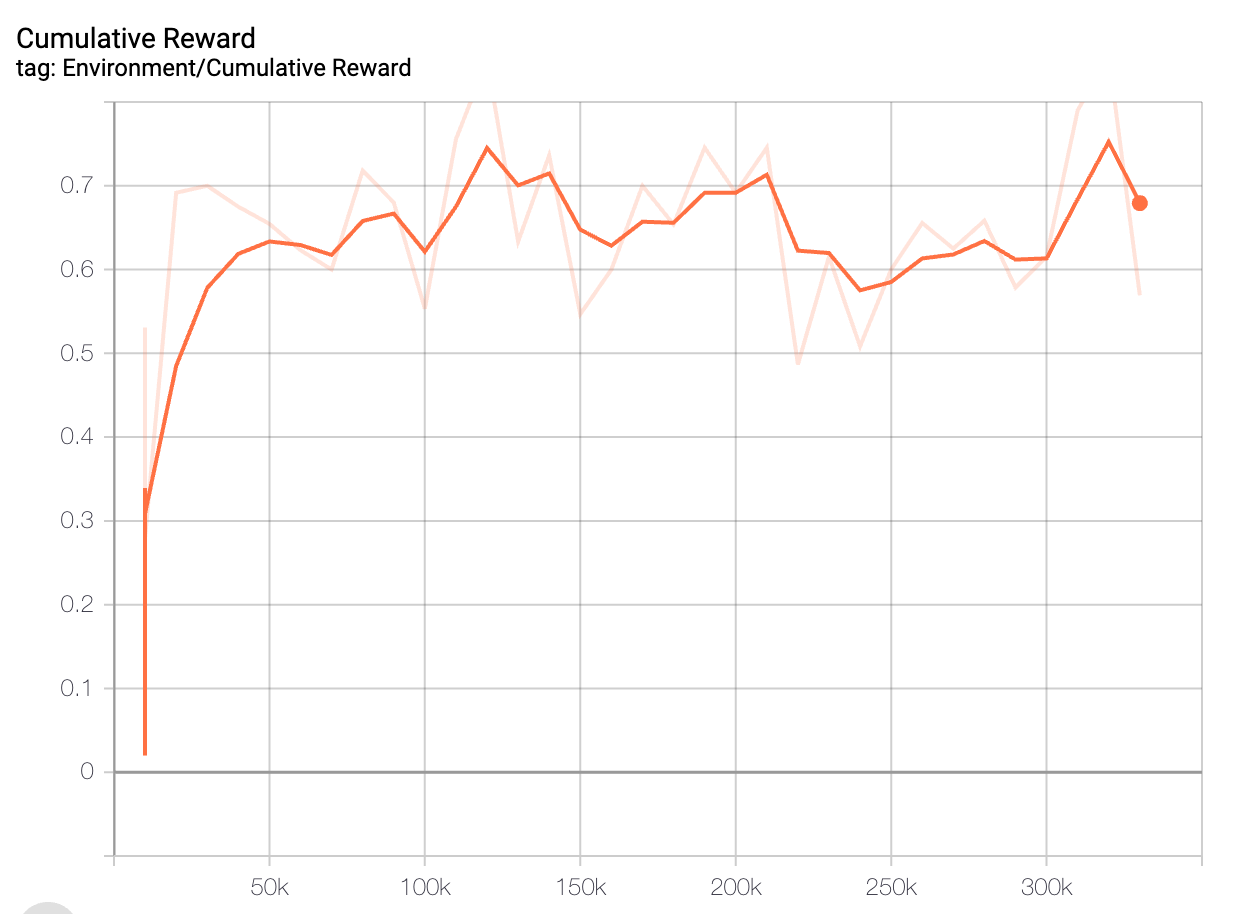
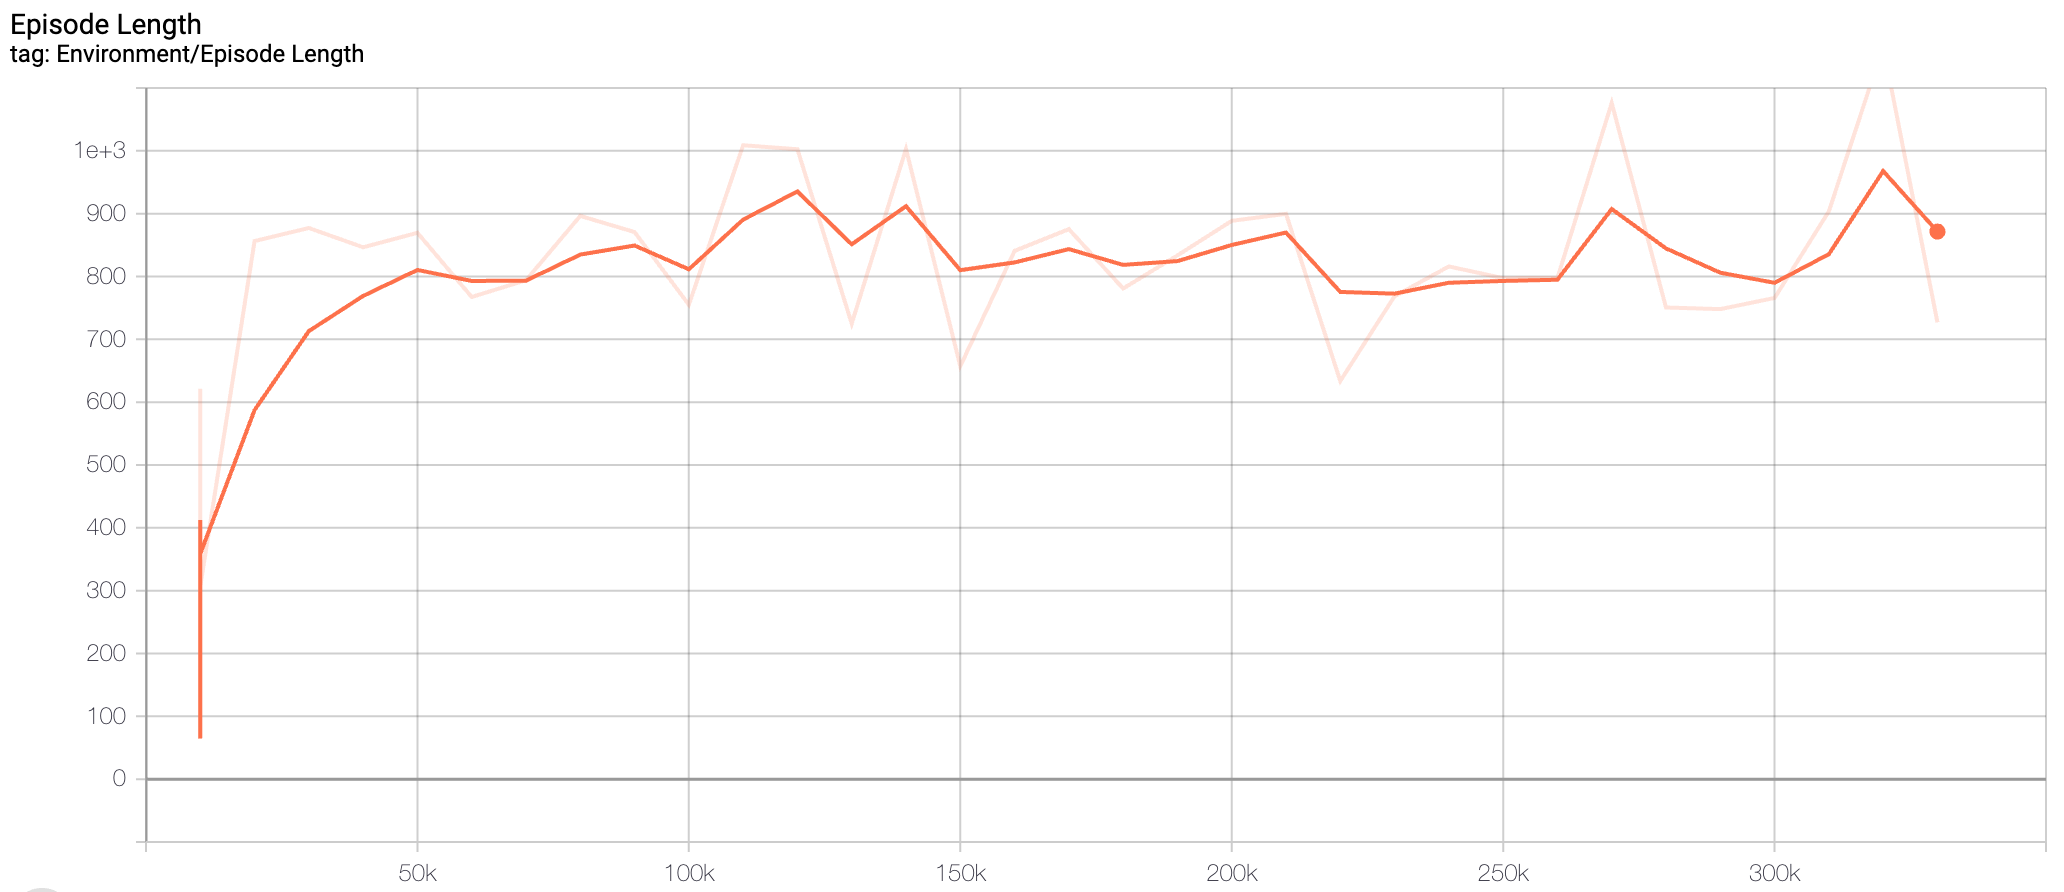
Results
As you can see, the AI was able to get to the end of the track, mission accomplished!
Final Thoughts
By building this simulated self-driving car, I learned core concepts of reinforcement learning. Along the way, I also learned to optimize my C# code to decrease training time even more.
This project was fascinating and I can't think of anything that would've been a better introduction to the world of Artificial Intelligence.